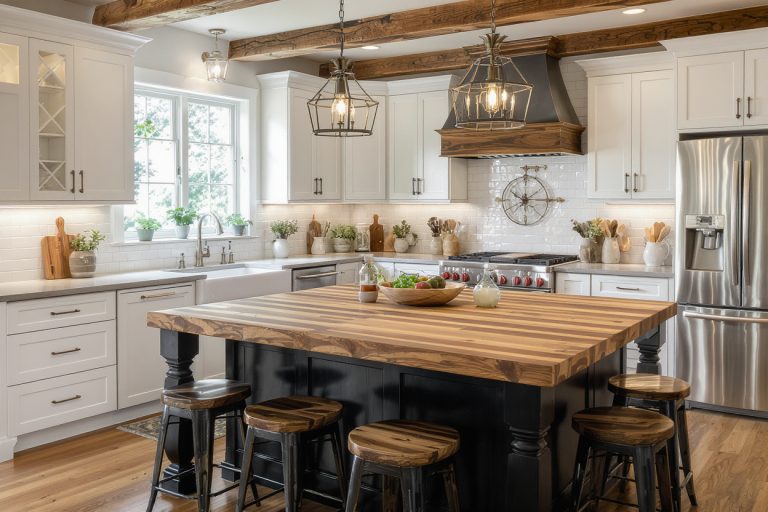
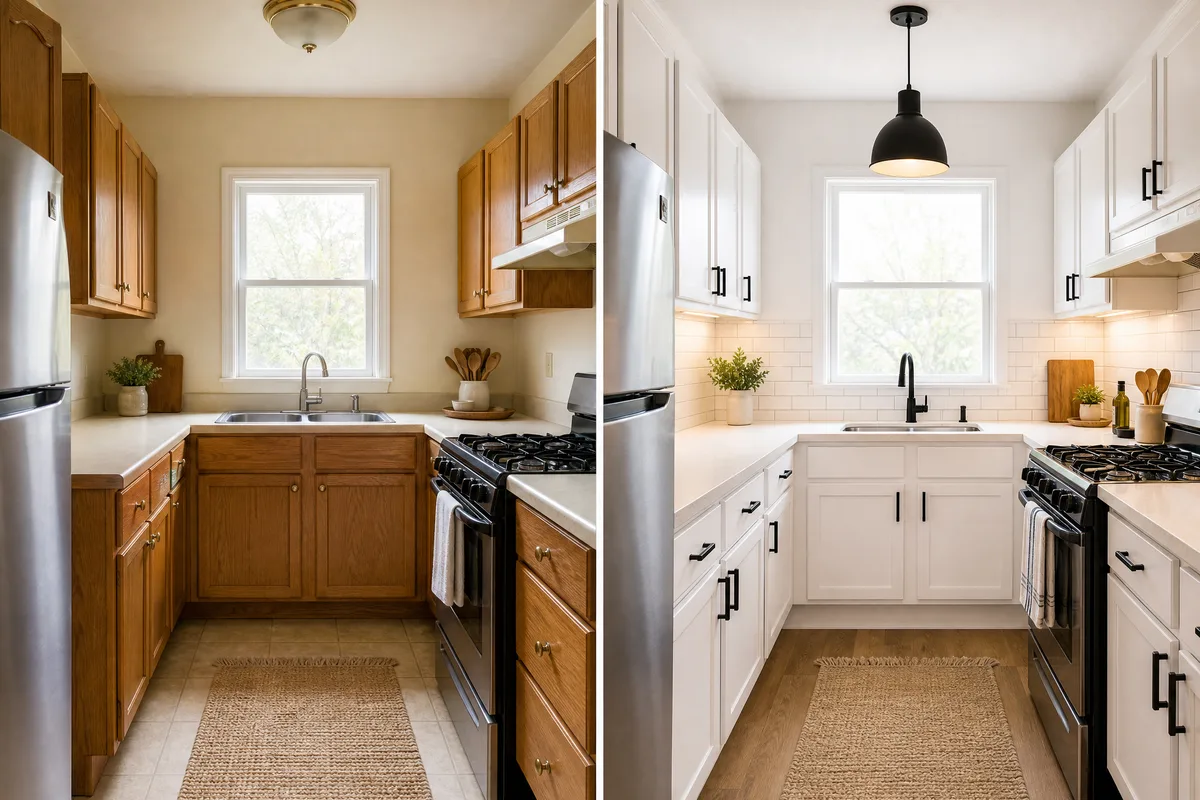
Small Kitchen Remodel Ideas Under $500 That Look Expensive
You don’t need to spend tens of thousands of dollars to fall back in love with your kitchen — sometimes all it takes is a weekend, a few smart purchases, and the right strategy. A small kitchen remodel on a budget can deliver stunning, high-end results when you know exactly where to put your energy and your dollars. Whether you’re renting, flipping, or simply tired of a dated space, these ideas prove that under $500 can go a very long way.
Key Takeaways
- You can achieve a high-end kitchen look for under $500 with strategic, targeted upgrades.
- Peel-and-stick backsplash tiles are one of the fastest and most affordable ways to transform kitchen walls.
- Swapping cabinet hardware is the single highest-impact change you can make for the lowest cost.
- Paint — on walls, cabinets, or even tile — is the most budget-friendly tool in any kitchen makeover.
- Lighting upgrades and open shelving styling can make a small kitchen feel dramatically larger and more luxurious.
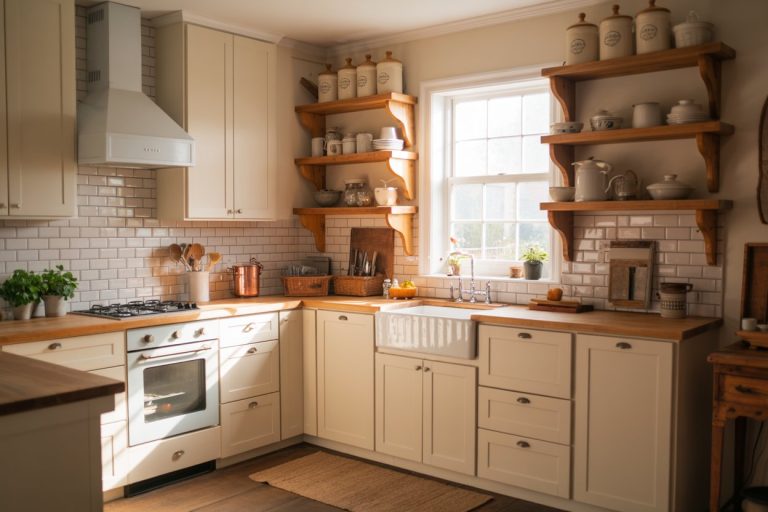
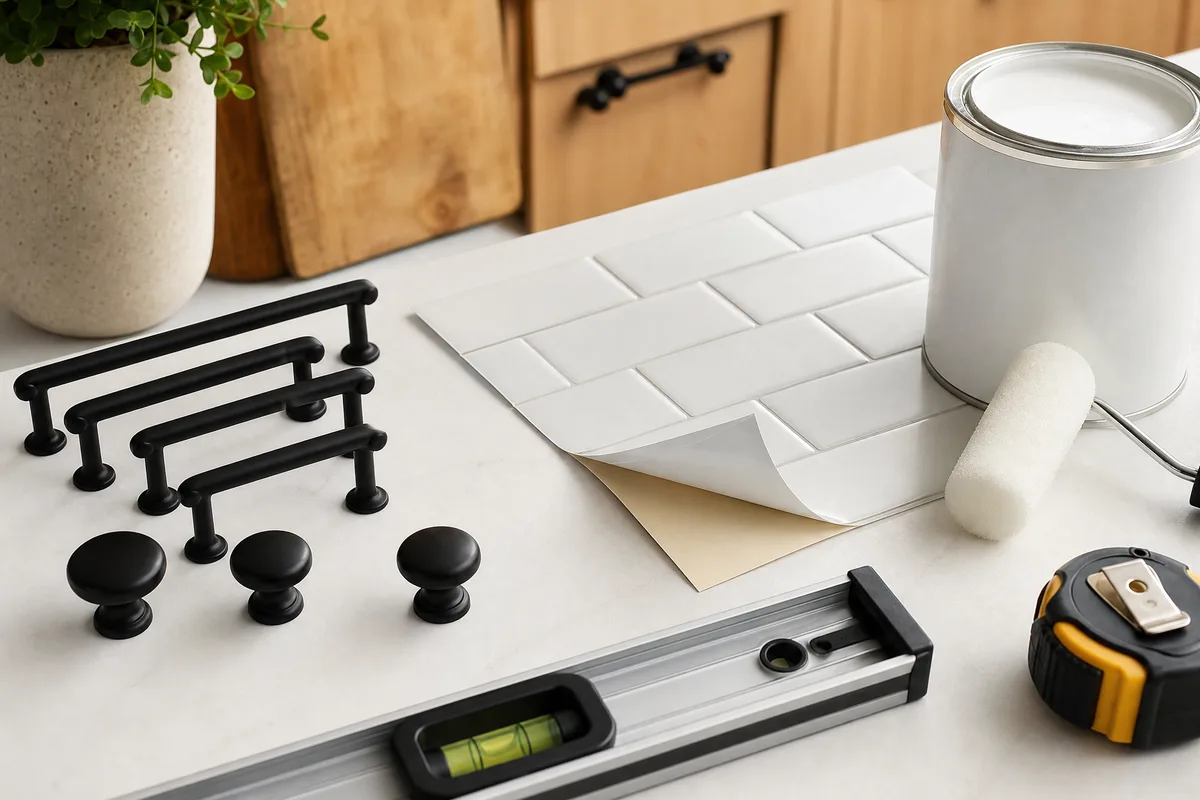
Cabinet Hardware Swaps: The $50 Transformation
If there’s one upgrade that consistently delivers the most visual impact per dollar, it’s swapping out your cabinet hardware. Old brass pulls from the 1990s or plain builder-grade knobs can date an entire kitchen instantly. Replacing them with matte black, brushed gold, or satin nickel hardware signals a deliberate, designed aesthetic that looks anything but budget.
A full set of cabinet knobs and pulls for an average small kitchen typically costs between $30 and $80 depending on the style and quantity. Look for multipacks on Amazon or shop clearance sections at home improvement stores. Bar pulls in a matte black finish are particularly on-trend right now and pair beautifully with both white and wood-toned cabinets.
Pro tip: Before buying, use a piece of painter’s tape to mock up the size and placement of larger bar pulls on your cabinet doors. This prevents costly mistakes and helps you visualize the final look. Also, make sure you’re measuring the hole spacing (called center-to-center distance) before ordering replacements — standard sizes are 3 inches and 5 inches.
Common mistake: Mixing too many metal finishes. Stick to one primary metal throughout your kitchen for a cohesive, high-end feel. Matte black works especially well because it reads as modern and intentional without feeling cold.
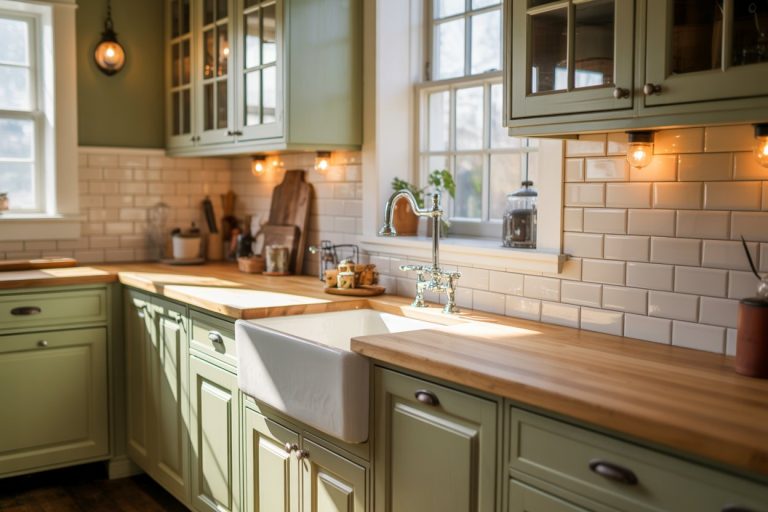
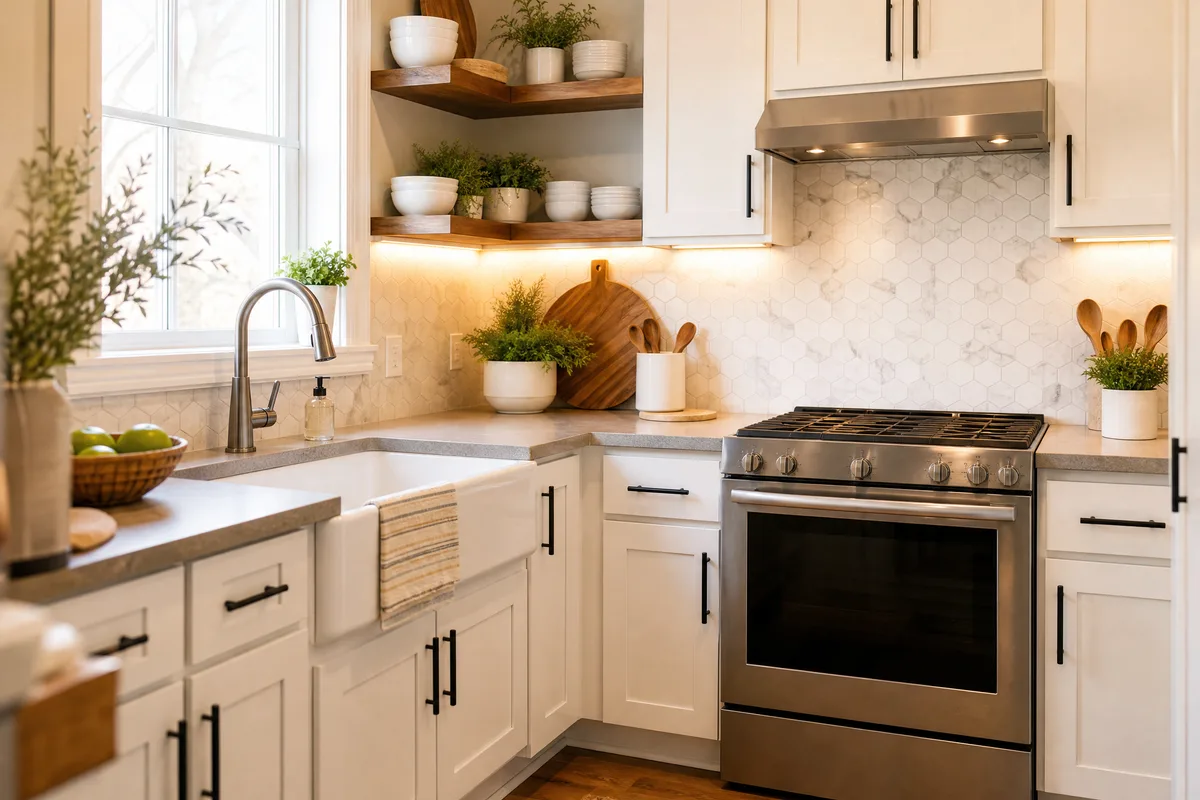
Peel-and-Stick Backsplash: Instant Luxury
Nothing dates a kitchen faster than a blank, boring wall behind the stove — or worse, old grout-stained tile. Peel-and-stick backsplash tiles have come an incredibly long way in the past few years, and today’s options genuinely mimic marble, subway tile, cement tile, and even natural stone with surprising realism.
A standard peel-and-stick backsplash project for a small kitchen (typically 10–15 square feet) will run between $40 and $120 depending on the tile style. For a more in-depth look at whether this option is right for your kitchen, check out this honest review of peel-and-stick kitchen backsplash that walks through the real pros and cons. If you want even more affordable options, there are also cheap kitchen backsplash ideas under $200 that include painted and wallpaper alternatives.
Pro tip: Clean your wall thoroughly with rubbing alcohol before installation — any grease or residue will prevent proper adhesion and cause peeling within weeks. Also, use a credit card or squeegee to press each tile firmly as you go, working out air bubbles from the center outward.
Common mistake: Skipping the level. Even peel-and-stick tiles need to be applied perfectly straight. Use a level and chalk line before you begin, especially around outlets and corners. A slightly crooked pattern will be impossible to ignore once it’s on the wall.
Paint Techniques That Mimic Expensive Finishes
Paint is the great equalizer of home improvement, and in the kitchen it can do far more than just change wall color. Here are three paint strategies that deliver outsized results for minimal investment:
Cabinet Painting
Painting your kitchen cabinets is the single most dramatic transformation you can make under $500. A quart of cabinet-specific paint (like Benjamin Moore Advance or Rust-Oleum Cabinet Transformations) costs $25–$50, and a full small kitchen can typically be done with 1–2 quarts. Going from honey oak or dingy cream to a crisp white, soft sage, or moody navy can make your kitchen look like it’s been professionally renovated. According to the National Association of the Remodeling Industry (NARI), cabinet refinishing is one of the highest ROI projects homeowners can undertake.
Two-Tone Wall Technique
Paint your upper walls a soft, warm white and use a moody, deeper hue on the lower third (below the chair rail or a painted line). This simple trick adds architectural interest that’s typically found in much more expensive, custom kitchens.
Painting Tile Grout
If you have ceramic tile that’s still in good shape but has dingy grout lines, grout paint pens ($10–$15 at hardware stores) can refresh the entire backsplash in an afternoon. This technique works best for transforming yellowed white grout back to bright white or going from white to charcoal gray for a more modern look. You can also explore how to paint a kitchen backsplash for a full technique walkthrough if you want to take it even further.
Lighting Upgrades Under $100
Lighting is one of the most overlooked elements of budget kitchen makeovers, yet it has an enormous impact on how a space feels. Swapping a dated flush-mount ceiling fixture for a modern pendant or semi-flush light instantly elevates the entire room. You can find stylish options at IKEA, Target, or Amazon for $30–$80 that look far more expensive than their price tags suggest.
Under-cabinet lighting is another game-changer. LED strip lights or plug-in puck lights ($15–$40) add a warm, layered glow that makes your kitchen feel like a restaurant kitchen — purposeful, polished, and professional. They also improve task lighting significantly, making your countertops easier and safer to work on.
Pro tip: If you can’t swap the fixture without an electrician, simply replace the bulbs in your existing fixtures with warm white LEDs (2700K–3000K color temperature). The shift from cool fluorescent to warm LED light alone transforms the mood of the entire kitchen dramatically.
Common mistake: Choosing lights that are too small for the space. In a small kitchen, one well-sized light over the sink or island reads as intentional. Three tiny fixtures scattered across the ceiling look like an afterthought. Bigger and bolder almost always wins.
Open Shelving and Shelf Styling on a Dime
Removing one or two upper cabinet doors and styling the exposed interior as open shelving is a completely free upgrade that can transform the look of your kitchen. If the cabinet interior isn’t in great shape, paint it a contrasting or complementary color before styling. This technique is particularly popular in farmhouse and modern kitchens and makes the space feel more open and curated.
If you don’t have cabinets to convert, floating shelves from IKEA’s LACK line start at under $10 per shelf. Add a few ceramic dishes, plants, and wooden cutting boards, and you have a styled vignette that looks like it belongs in an interior design magazine. Before deciding whether to keep upper cabinets or go full open shelving, it’s worth reading about the tradeoffs in this detailed comparison of open shelving vs. cabinets for small kitchens.
Pro tip: When styling open shelves, use the rule of three — group items in odd numbers and vary the height within each grouping. Keep the palette tight (two or three coordinating colors) to avoid visual clutter that makes a small kitchen feel chaotic.

Faucet and Fixture Refresh
A new kitchen faucet is one of those upgrades that signals quality the moment anyone walks into the room. If your current faucet is visibly dated, corroded, or just feels cheap, replacing it is a surprisingly manageable DIY project. You can find beautiful, solid pull-down faucets in matte black or brushed nickel for $60–$120 that look like they belong in a $50,000 kitchen renovation.
The sink drain, soap dispenser, and even the cabinet under-sink organizer all contribute to the overall kitchen impression. Coordinating these small details in the same metal finish as your cabinet hardware creates a designer-level cohesion that most people can’t quite put their finger on — they just know the kitchen looks expensive.
Common mistake: Forgetting to turn off the water supply before starting. This sounds obvious, but it’s the number one error new DIYers make. Also, always have a bucket and old towels ready. Even after shutting off the supply, residual water in the pipes will drain when you disconnect the old faucet.
Your Full Budget Breakdown Under $500
Here’s how a realistic, comprehensive small kitchen remodel on a budget might look when you combine all of these strategies:
- Cabinet hardware (knobs + pulls): $50–$80
- Peel-and-stick backsplash tile: $60–$120
- Cabinet paint + primer + brushes: $40–$70
- New light fixture: $40–$80
- Under-cabinet LED strip lights: $20–$40
- New faucet: $70–$120
- Shelf styling accessories (plants, ceramics, etc.): $30–$60
- Grout paint pen + wall paint: $20–$30
- Total estimated range: $330–$600
With smart shopping — using Amazon sales, IKEA, Habitat for Humanity ReStores, and Facebook Marketplace — staying well under $500 is entirely achievable. Prioritize the hardware swap and backsplash first since they deliver the most visual impact per dollar. If you’re looking for even more ways to maximize a small kitchen’s potential, these small kitchen ideas that make tiny spaces feel huge are full of creative inspiration.
Frequently Asked Questions
Can I really remodel my kitchen for under $500?
Absolutely — with targeted, strategic upgrades rather than a full gut renovation. A small kitchen remodel on a budget works best when you focus on high-impact, low-cost changes like cabinet hardware, peel-and-stick backsplash, paint, and lighting. These cosmetic upgrades don’t require permits or contractors, and the results can genuinely look like a professionally designed renovation.
Is peel-and-stick backsplash durable enough for a kitchen?
Modern peel-and-stick backsplash tiles are significantly more durable than earlier versions, especially those made from vinyl composite or actual stone tile with peel-and-stick backing. They hold up well in kitchens when properly installed on clean, dry, grease-free surfaces. Avoid placing them directly behind a high-heat stove without a heat buffer, and they should last 3–5 years or more with normal care.
What’s the best color to paint kitchen cabinets on a budget?
White remains the most universally flattering and resale-friendly choice for kitchen cabinets, but soft sage green, warm greige (grey-beige), and deep navy are all popular options that photograph beautifully and feel elevated. The key is using a cabinet-specific paint formula with a built-in primer for the most durable, smooth finish without excessive coats or prep work.
Do I need any special skills for these DIY kitchen upgrades?
Most of these projects require only basic tools and beginner-level DIY confidence. Swapping cabinet hardware requires only a screwdriver. Installing peel-and-stick tile requires a level, a utility knife, and patience. Painting cabinets takes the most time and preparation but is genuinely achievable for first-timers with the right primer, paint, and brushes. The faucet swap is the most technically involved but still within reach for anyone comfortable following step-by-step instructions.
Conclusion
A small kitchen remodel on a budget doesn’t require a contractor, a permit, or a second mortgage. With the right combination of hardware swaps, peel-and-stick tile, fresh paint, and smart lighting choices, you can walk into a kitchen that feels completely new — and completely yours — for well under $500. The secret is prioritizing the changes that have the most visual impact and approaching each project with patience and a little bit of planning.
Start with one upgrade this weekend — swap out your cabinet hardware, install a backsplash, or paint a single wall — and let the momentum build. You’ll be amazed how quickly a dated, forgettable kitchen becomes the kind of space you actually want to spend time in. Your dream kitchen is closer than you think, and it starts with a screwdriver and a Saturday morning.