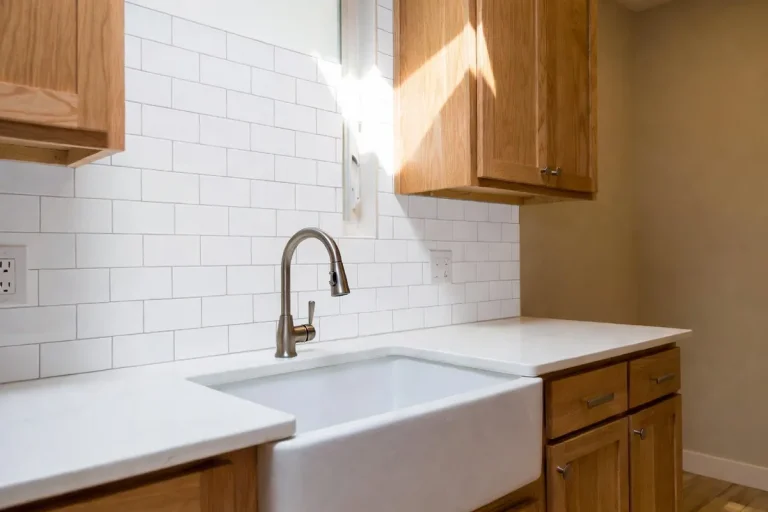
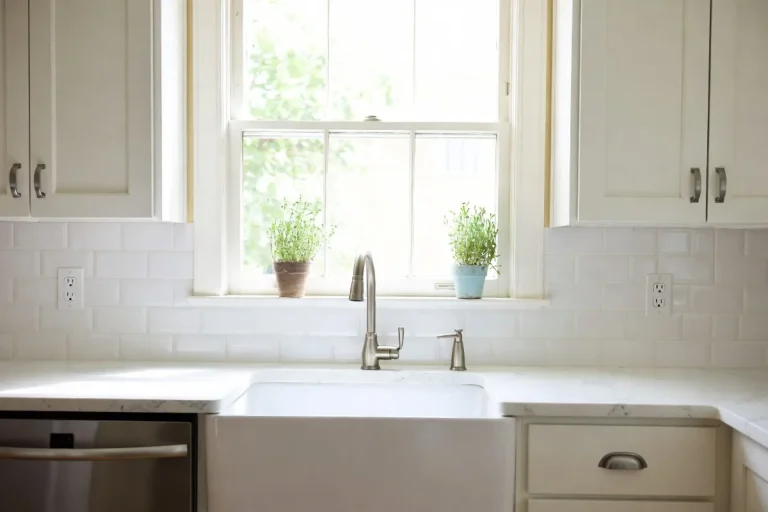
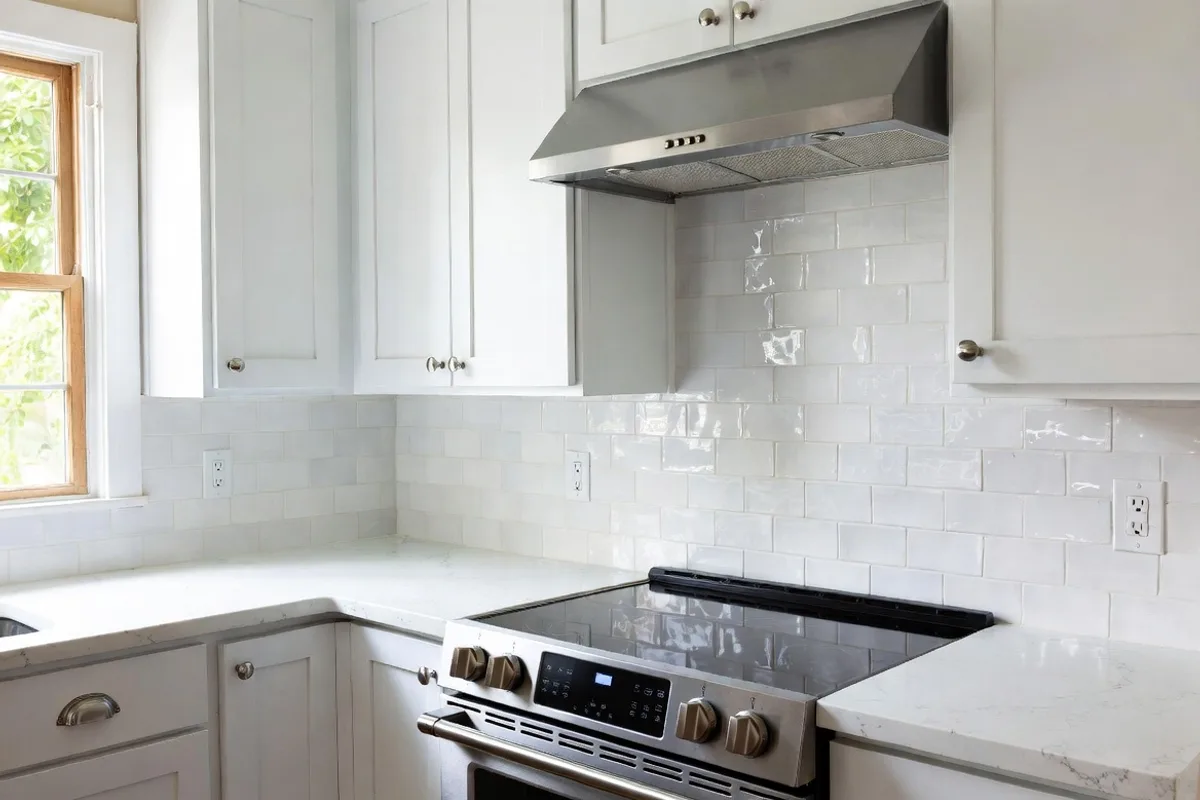
How to Install a Subway Tile Backsplash Step by Step
Installing a subway tile backsplash is one of the most rewarding kitchen upgrades you can tackle as a DIYer — it adds timeless charm, protects your walls, and costs a fraction of what a contractor would charge. Whether you’re refreshing a tired kitchen or putting your own stamp on a new home, knowing how to install a subway tile backsplash correctly makes all the difference between a result you’ll love for decades and one you’ll want to redo by next spring.
Key Takeaways
- Proper surface prep — cleaning, patching, and priming — is the foundation of a long-lasting tile job.
- Choosing the right layout pattern (classic horizontal, herringbone, or vertical stack) dramatically changes the finished look of your backsplash.
- Use a notched trowel and polymer-modified tile adhesive for the strongest, most reliable bond on kitchen walls.
- Grout color is just as important as tile color — it can make your backsplash feel bold, subtle, or anything in between.
- Sealing your grout after installation protects it from moisture, grease, and staining for years to come.
Tools and Materials You’ll Need
Before you start tiling, gathering every tool and material upfront saves you from mid-project hardware store runs. There’s nothing more frustrating than getting into a groove and realizing you forgot tile spacers.
Here’s what you’ll need for a standard kitchen backsplash project:
- Subway tiles (order 10–15% extra for cuts and breakage)
- Tile adhesive or mastic (polymer-modified thinset is ideal for kitchen walls)
- Notched trowel (a ¼” x ¼” V-notch works well for standard 3×6 subway tiles)
- Tile spacers (1/16″ for tight joints, 1/8″ for a more traditional look)
- Tile cutter or wet saw (a manual score-and-snap cutter works for straight cuts; a wet saw is better for precision)
- Tile nipper (for small curved cuts around outlets)
- Level and measuring tape
- Chalk line
- Grout and grout float
- Grout sealer
- Sponges, buckets, and clean rags
- Painter’s tape and drop cloths
- Safety glasses and gloves
Pro tip: For kitchen backsplashes, always choose an unsanded grout for joints under 1/8″ wide, and sanded grout for anything wider. Using the wrong type can lead to cracking over time.
Preparing Your Wall Surface
Surface preparation is genuinely the unglamorous hero of any tile project. Skip or rush this step, and even the most beautifully laid tile will eventually pop, crack, or look wavy. Take your time here — it pays off.
Cleaning the Wall
Kitchen walls near the stove accumulate grease, even when they look clean. Use a degreasing cleaner or a mixture of dish soap and warm water to scrub the entire area you’ll be tiling. Rinse thoroughly and let it dry completely — at least a few hours, ideally overnight.
Patching and Priming
Fill any holes, dents, or damaged drywall with spackle and sand smooth once dry. If your wall has a semi-gloss or glossy paint finish, lightly sand it with 80-grit sandpaper so the adhesive has something to grip. For particularly slick or porous surfaces, apply a tile primer (sometimes called a bonding primer) before tiling. This single step dramatically improves adhesion.
Remove outlet covers and switch plates. Use painter’s tape to protect your countertops, cabinets, and appliances from adhesive drips.
Planning Your Tile Layout
This is where you get to be creative — and strategic. How you plan your layout determines how the finished backsplash looks and how smoothly the installation goes.
Choosing a Pattern
The classic running bond (offset brick) pattern is the most popular for subway tiles and the easiest to install. Each row is offset by half a tile from the row above. If you want something more dramatic, consider:
- Vertical stack bond — tiles stacked directly on top of each other for a modern, elongated feel
- Herringbone — tiles set at 45-degree angles for a dynamic, textured look (more advanced cutting required)
- Horizontal stack bond — clean, grid-like, and very contemporary
Finding Your Starting Point
Never start from a corner — corners are almost never perfectly plumb. Instead, find the center of your backsplash area and use a chalk line to snap a vertical center line. Then snap a horizontal line just above your countertop (accounting for one tile width plus a small gap for caulk). This grid becomes your guide for keeping everything straight and symmetrical.
Pro tip: Do a dry layout first. Lay tiles out on your counter following your planned pattern to see how edge cuts will fall. Adjust your starting point to avoid having tiny slivers of tile at the edges — anything less than half a tile width looks awkward and is harder to cut cleanly.
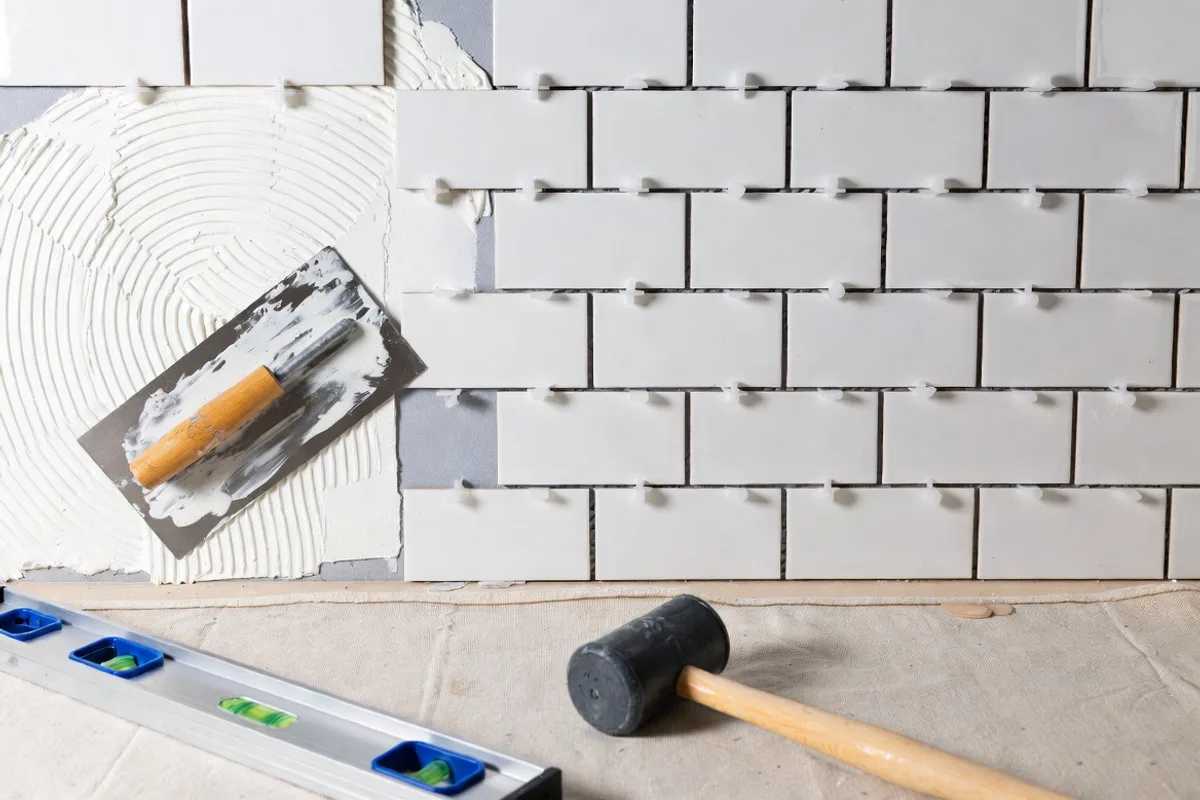
How to Set and Apply the Tile
Now comes the satisfying part — actually putting tile on the wall. Work in small sections (about 2–3 square feet at a time) so your adhesive doesn’t dry out before you set the tiles.
Applying the Adhesive
Use your notched trowel to spread thinset or mastic on the wall, holding the trowel at a 45-degree angle to create uniform ridges. These ridges ensure even coverage and a strong bond. Work from your center lines outward.
Setting the Tiles
Press each tile firmly onto the adhesive with a slight twisting motion to collapse the ridges and create full contact. Insert tile spacers at each corner as you go. Use your level frequently — every few tiles — to confirm your rows are staying straight. A rubber mallet and a beating block (a scrap piece of wood covered in fabric) can help gently tap tiles into alignment without cracking them.
When you reach outlets, measure carefully and mark your cut lines with a pencil. Use a wet saw or tile nipper to make precise cuts. Always wear safety glasses when cutting tile.
Let the adhesive cure for the time recommended on the packaging — usually 24 hours — before grouting.
Grouting Your Subway Tile Backsplash
Grout does more than fill gaps — it locks everything together, defines the pattern, and sets the entire visual tone of the backsplash. Your grout color choice is nearly as important as your tile choice.
Mixing the Grout
Mix grout according to the manufacturer’s instructions until it reaches a peanut butter consistency — thick enough to hold its shape but smooth enough to spread easily. Let it rest (slake) for about 5–10 minutes, then stir once more before using.
Applying and Cleaning
Remove all tile spacers before grouting. Using a grout float held at a 45-degree angle, spread grout diagonally across the tiles, pressing it firmly into the joints. Work in small sections of about 4 square feet. After filling the joints, use the edge of the float to scrape off as much excess grout from the tile faces as possible.
Wait 15–20 minutes, then begin cleaning with a damp (not soaking wet) sponge, wiping in circular motions. Rinse your sponge frequently. After a light haze appears on the tiles as they dry, buff it away with a clean dry cloth. Repeat cleaning passes until the tiles are clear.
Pro tip: Don’t grout the joint where the tile meets the countertop. This joint should be filled with flexible silicone caulk in a matching color instead. Grout is rigid and will crack at this movement joint over time.
Sealing the Grout for Long-Term Protection
Kitchen backsplashes face daily exposure to steam, grease, water, and food splatter. Sealing your grout is essential — it creates an invisible barrier that prevents staining and makes cleanup dramatically easier.
Wait at least 48–72 hours after grouting before sealing (some grouts require up to a week — check the label). Apply a penetrating grout sealer using a small brush or applicator bottle, working it into the grout lines carefully. Wipe any excess off the tile faces immediately. Allow to dry per the manufacturer’s instructions, then apply a second coat for extra protection.
Plan to reseal your grout every 1–2 years depending on how much cooking and moisture your kitchen sees. A quick water bead test tells you when it’s time — if water soaks in rather than beading up, it’s time to reseal.
Common Mistakes to Avoid
Even careful DIYers can stumble on a few predictable pitfalls. Here’s what to watch out for:
- Starting in a corner: Corners look square but rarely are. Always center your layout from the middle of the wall out.
- Using too much water when cleaning grout: Excess water dilutes the grout, weakens it, and can cause discoloration. Keep your sponge damp, not dripping.
- Skipping the back-butter on edge tiles: For tiles at the edges or around outlets where you can’t get full trowel coverage, apply adhesive directly to the back of the tile (called back-buttering) for full contact.
- Rushing the cure time: Both adhesive and grout need time to cure properly. Moving too fast leads to cracked grout or tiles that pop off the wall.
- Forgetting to caulk the countertop joint: This is one of the most common DIY mistakes and leads to cracked grout lines within months.
- Not sealing the grout: Kitchen grout that isn’t sealed will absorb oils and turn dingy within weeks of use.
Frequently Asked Questions
How long does it take to install a subway tile backsplash?
For a typical kitchen backsplash (roughly 20–30 square feet), plan for about 1–2 days of active work spread across a weekend. Day one covers prep and setting the tile. Day two (after the adhesive cures overnight) handles grouting, cleaning, and caulking. You can seal the grout on day three or whenever the cure time has passed. Having all your materials ready in advance keeps the process moving smoothly.
Do I need special tools to cut subway tile?
For straight cuts, a manual tile score-and-snap cutter is affordable and works well for standard ceramic subway tile. For more precise cuts, L-shaped cuts around outlets, or if you’re using porcelain subway tile (which is denser and harder), a wet tile saw gives much cleaner results. You can rent a wet saw from most home improvement stores for a day rate that’s well worth the cost.
Can I install subway tile over existing tile?
In many cases, yes — tiling over existing tile is possible as long as the existing tile is fully adhered, level, and in good condition. Make sure the combined weight won’t exceed your wall’s capacity (check with your tile supplier or a contractor if unsure). Sand or scuff the existing glaze lightly and apply a bonding primer before tiling. Keep in mind that this approach raises the surface level, which can affect outlet depths and trim pieces.
What grout color looks best with white subway tile?
This is largely a matter of personal style! White or bright white grout creates a seamless, clean look that makes the tile feel continuous. Light gray grout (like a classic warm gray) defines each tile beautifully and is one of the most popular choices for its timeless appeal. Dark charcoal or black grout creates a bold, graphic contrast that’s very on-trend and looks stunning in both modern and eclectic kitchens. Consider your cabinet colors and countertop tones when deciding — bring home samples and hold them against your existing finishes before committing.
Conclusion
Learning how to install a subway tile backsplash is one of those DIY milestones that truly transforms a kitchen — and your confidence as a home decorator. From prepping your walls and planning your layout to setting tiles, grouting, and sealing, each step builds on the last, and the finished result is something you’ll be proud to show off every single day. The key is taking your time, following the right sequence, and not skipping the details that protect your work long-term. Ready to get started? Gather your tools, pick your grout color, and give that kitchen the backsplash it deserves. We’d love to see how it turns out — share your before and after in the comments below!